반응형

overthewire.org 문제 풀이 / Natas Level 10 → Level 11


이번 문제는 쿠키가 XOR 암호화로 보호되고 있다고 합니다. 

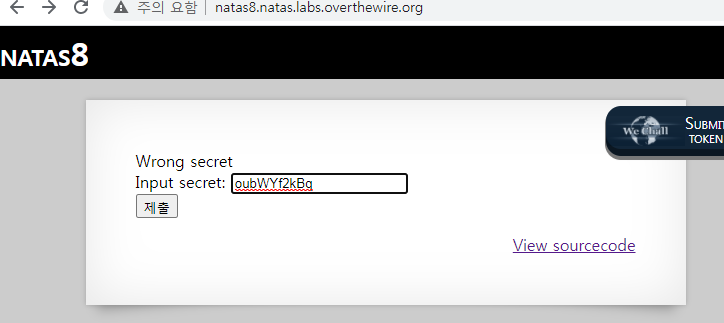
그리고 배경화면 색상을 입력하는 부분이 있습니다. 


먼저 소스코드를 보겠습니다. 

<html>
<head>
<!-- This stuff in the header has nothing to do with the level -->
<link rel="stylesheet" type="text/css" href="http://natas.labs.overthewire.org/css/level.css">
<link rel="stylesheet" href="http://natas.labs.overthewire.org/css/jquery-ui.css" />
<link rel="stylesheet" href="http://natas.labs.overthewire.org/css/wechall.css" />
<script src="http://natas.labs.overthewire.org/js/jquery-1.9.1.js"></script>
<script src="http://natas.labs.overthewire.org/js/jquery-ui.js"></script>
<script src=http://natas.labs.overthewire.org/js/wechall-data.js></script><script src="http://natas.labs.overthewire.org/js/wechall.js"></script>
<script>var wechallinfo = { "level": "natas11", "pass": "<censored>" };</script></head>
<?

$defaultdata = array( "showpassword"=>"no", "bgcolor"=>"#ffffff");

function xor_encrypt($in) {
    $key = '<censored>';
    $text = $in;
    $outText = '';

    // Iterate through each character
    for($i=0;$i<strlen($text);$i++) {
    $outText .= $text[$i] ^ $key[$i % strlen($key)];
    }

    return $outText;
}

function loadData($def) {
    global $_COOKIE;
    $mydata = $def;
    if(array_key_exists("data", $_COOKIE)) {
    $tempdata = json_decode(xor_encrypt(base64_decode($_COOKIE["data"])), true);
    if(is_array($tempdata) && array_key_exists("showpassword", $tempdata) && array_key_exists("bgcolor", $tempdata)) {
        if (preg_match('/^#(?:[a-f\d]{6})$/i', $tempdata['bgcolor'])) {
        $mydata['showpassword'] = $tempdata['showpassword'];
        $mydata['bgcolor'] = $tempdata['bgcolor'];
        }
    }
    }
    return $mydata;
}

function saveData($d) {
    setcookie("data", base64_encode(xor_encrypt(json_encode($d))));
}

$data = loadData($defaultdata);

if(array_key_exists("bgcolor",$_REQUEST)) {
    if (preg_match('/^#(?:[a-f\d]{6})$/i', $_REQUEST['bgcolor'])) {
        $data['bgcolor'] = $_REQUEST['bgcolor'];
    }
}

saveData($data);


?>

<h1>natas11</h1>
<div id="content">
<body style="background: <?=$data['bgcolor']?>;">
Cookies are protected with XOR encryption<br/><br/>

<?
if($data["showpassword"] == "yes") {
    print "The password for natas12 is <censored><br>";
}

?>

<form>
Background color: <input name=bgcolor value="<?=$data['bgcolor']?>">
<input type=submit value="Set color">
</form>

<div id="viewsource"><a href="index-source.html">View sourcecode</a></div>
</div>
</body>
</html>

data의 default값은 "showpassword"는 no이고, bgcolor 값은 #ffffff입니다. 

우리는 data 값을 howpassword"는 yes, bgcolor 값은 #ffffff로 만들어야 합니다.

loadData 함수를 보면 COOKIE의 data 값을 아래와 같은 순으로 디코딩하여 $tempdata를 만들어 냅니다. 

=> base64_decode() -> xor_encrypt() -> json_decode()


그렇기 때문에 data 값을 howpassword"는 yes, bgcolor 값은 #ffffff 을 아래 순으로 인코딩하여 쿠키값으로 설정하면 이 문제를 풀 수 잇습니다.

=> json_encode() -> xor_encrypt() -> base64_encode() 

그런데 xor_encrypt()를 하기 위해서는 XOR에 사용되는 key 알아야 합니다. 


우선 saveData 함수를 보면 setcookie 함수로 "data"값이 설정됩니다. 

json_encode() -> xor_encrypt() -> base64_encode() 순으로 인코딩이 됩니다. 

EditThisCookie로 보면 쿠키의 data 값이 표시되는 것을 볼 수 있습니다. 


OverTheWire

We're hackers, and we are good-looking. We are the 1%. Username: natas11 URL: http://natas11.natas.labs.overthewire.org

overthewire.org


반응형
반응형

overthewire.org 문제 풀이 / Natas Level 9 → Level 10


코드를 보면 NATAS9와 다른 점은 preg_match() 함수가 추가되었다는 점입니다. 

입력란에 "[;|&]" 문구가 포함되면 fillter에 걸려 passthru 함수를 실행시키지 못하게 됩니다. 


하여 아래와 같이 입력하여, "[;|&]"를 우회해 natas11 파일을 열어 보겠습니다.

grep -i ^ /etc/natas_webpass/natas11 dictionary.txt

<?
$key = "";

if(array_key_exists("needle", $_REQUEST)) {
    $key = $_REQUEST["needle"];
}

if($key != "") {
    if(preg_match('/[;|&]/',$key)) {
        print "Input contains an illegal character!";
    } else {
        passthru("grep -i $key dictionary.txt");
    }
}
?>


그러면 아래와 같이 natas11의 패스워드를 확인할 수 있습니다.

반응형
반응형

overthewire.org 문제 풀이 / Natas Level 8 → Level 9


먼저 View sourcecode 링크를 살펴보겠습니다.


핵심은 passthru 함수에 있습니다. 

passthru 함수에서 "grep -i $key dictionary.txt"를 전달인자로 주고 있습니다. 

$key를 가지고 dictionary.txt에 일치하는 문구열을 찾으려고 하는 명령으로 보입니다. 

하지만, 여기에 $key를 "| cat /etc/natas_webpass/natas10"를 넣어 natas10의 패스워드 파일을 보도록 하겠습니다. 

<html>
<head>
<!-- This stuff in the header has nothing to do with the level -->
<link rel="stylesheet" type="text/css" href="http://natas.labs.overthewire.org/css/level.css">
<link rel="stylesheet" href="http://natas.labs.overthewire.org/css/jquery-ui.css" />
<link rel="stylesheet" href="http://natas.labs.overthewire.org/css/wechall.css" />
<script src="http://natas.labs.overthewire.org/js/jquery-1.9.1.js"></script>
<script src="http://natas.labs.overthewire.org/js/jquery-ui.js"></script>
<script src=http://natas.labs.overthewire.org/js/wechall-data.js></script><script src="http://natas.labs.overthewire.org/js/wechall.js"></script>
<script>var wechallinfo = { "level": "natas9", "pass": "<censored>" };</script></head>
<body>
<h1>natas9</h1>
<div id="content">
<form>
Find words containing: <input name=needle><input type=submit name=submit value=Search><br><br>
</form>


Output:
<pre>
<?
$key = "";

if(array_key_exists("needle", $_REQUEST)) {
    $key = $_REQUEST["needle"];
}

if($key != "") {
    passthru("grep -i $key dictionary.txt");
}
?>
</pre>

<div id="viewsource"><a href="index-source.html">View sourcecode</a></div>
</div>
</body>
</html>


그러면 아래와 같이 natas10의 패스워드 파일의 내용을 확인할 수 있습니다.

반응형
반응형

overthewire.org 문제 풀이 / Natas Level 7 → Level 8


admin을 입력하면 아래와 같이 Wrong secret가 출력됩니다. 

View sourcecode 링크를 클릭해 보겠습니다. 


아래와 같은 코드가 생성됩니다. 

아래 구문을 보면 $encodedSecret 값과 입력란의 값을 encodeSecret 함수의 인자로 넣어 반환된 값과 동일하면 natas9 패스워드를 확인할 수 있습니다. 


encodeSecret 함수를 전달인자를 base64로 인코딩한 값을 strrev() 함수로 문자열을 뒤집습니다. 

또한 그 값을 bin2hex 함수로 hex 코드로 변환하였습니다. 


$encodedSecret의 값을 encodeSecret 함수에서 진행한 것을 역순으로 진행하여, 어떠한 값을 입력란에 넣어야 하는지 찾아 보겠습니다. 

<html>
<head>
<!-- This stuff in the header has nothing to do with the level -->
<link rel="stylesheet" type="text/css" href="http://natas.labs.overthewire.org/css/level.css">
<link rel="stylesheet" href="http://natas.labs.overthewire.org/css/jquery-ui.css" />
<link rel="stylesheet" href="http://natas.labs.overthewire.org/css/wechall.css" />
<script src="http://natas.labs.overthewire.org/js/jquery-1.9.1.js"></script>
<script src="http://natas.labs.overthewire.org/js/jquery-ui.js"></script>
<script src=http://natas.labs.overthewire.org/js/wechall-data.js></script><script src="http://natas.labs.overthewire.org/js/wechall.js"></script>
<script>var wechallinfo = { "level": "natas8", "pass": "<censored>" };</script></head>
<body>
<h1>natas8</h1>
<div id="content">

<?

$encodedSecret = "3d3d516343746d4d6d6c315669563362";

function encodeSecret($secret) {
    return bin2hex(strrev(base64_encode($secret)));
}

if(array_key_exists("submit", $_POST)) {
    if(encodeSecret($_POST['secret']) == $encodedSecret) {
    print "Access granted. The password for natas9 is <censored>";
    } else {
    print "Wrong secret";
    }
}
?>

<form method=post>
Input secret: <input name=secret><br>
<input type=submit name=submit>
</form>

<div id="viewsource"><a href="index-source.html">View sourcecode</a></div>
</div>
</body>
</html>

아래 사이트에서 php 구문을 입력하여 보았습니다. 

$encodedSecret의 값을 encodeSecret 함수에서 진행한 것을 역순으로 진행하였을 때, 생성된 코드를 입력란에 넣었습니다.

생성된 코드를 입력란에 넣고 제출하면 natas9의 패스워드를 확인할 수 있습니다.

반응형

+ Recent posts